In an ideal scenario, walls would be perfectly flat, square, and free from any switches, outlets, cabinets, or lighting. That would make brick slip installation straightforward. However, actual homes aren’t display spaces, and actual walls come with plenty of challenges. The positive side? Brick slips can still achieve a perfect appearance around obstacles it simply requires the right technique.
Consider brick slip fitting similar to bespoke tailoring. Ready-made solutions might seem viable initially, but precision fitting is what creates that custom-made appearance for your space. This manual explains precisely how to install around outlets, lighting, cabinetry, shelving, and other features, while maintaining both safety standards and visual appeal.
Taking Down Skirting and Coving, Prior to placing any brick slips, prepare your surface properly. Skirting boards and coving need complete removal. Keeping these elements in place results in unsightly edges and destroys the authentic brick wall appearance.
For connecting walls, trim back skirting and coving approximately twenty-five millimetres. This creates space for brick slips to nestle neatly underneath, producing a smooth transition that appears deliberate rather than improvised.
This procedure often gets overlooked, which becomes obvious in the final result. Allowing brick slips to extend slightly beneath adjacent finishes eliminates visible seams that advertise “aftermarket addition.” The outcome? A wall that appears original to the structure.
Understanding Why Proper Preparation Is Essential
Thorough preparation prevents wasted time, expense, and headaches down the line. Skipping this phase resembles constructing on unstable ground the initial appearance might seem acceptable, but flaws will emerge.
Disconnecting Power and Detaching Outlets, Safety must always come first. Before handling any outlets or switches, disconnect the appropriate circuit at your main panel. After cutting power, remove the faceplates by unscrewing them and carefully pulling them from the wall.
Keep the electrical wiring in position and ensure it remains safely secured while you complete your work.
Selecting Appropriate Outlet Fasteners
Brick slips increase wall thickness, meaning original outlet screws will prove inadequate during reinstallation. You’ll usually require screws approximately twenty-five millimetres longer to account for the additional depth.
Planning for Increased Wall Thickness
Overlooking depth considerations ranks among the most frequent errors. When outlets aren’t properly extended forward, they’ll appear sunken and incomplete or create safety hazards.

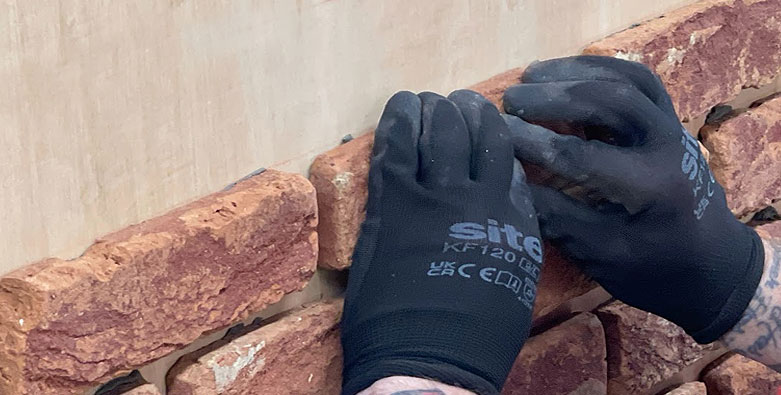
Precise Measuring and Cutting of Brick Slips, When reaching an outlet, measure with precision and cut brick slips for a tight fit around the outlet box. Guesswork won’t suffice here. Minor errors become immediately apparent after faceplate replacement.
After positioning the slips, apply mortar carefully right up to the outlet perimeter. Invest time in this step. Crisp edges distinguish between amateur and professional results.

Following outlet reinstallation with extended screws, seal around the perimeter to eliminate any small gaps. Carefully applied mortar works effectively, though caulk or silicone sealant can also produce neat results.
Safely Detaching Light Fixtures, Wall-mounted lights require complete removal before beginning work, naturally with power disconnected. Leave wiring exposed but properly secured.
When cables align conveniently with a mortar joint, you’re fortunate. Simply apply pointing around it during that stage, and the fixture will conceal the remainder.
When cables emerge in inconvenient locations at the top, bottom, or middle of a slip cutting becomes necessary. A hole saw or carefully drilled opening produces optimal results. Accuracy matters significantly here, as poorly positioned holes can disrupt the entire course.
Fortunately, light fixtures typically cover more surface area than anticipated, so absolute perfection isn’t mandatory just reasonable accuracy.
Working with Tile Cutters and Grinders, For linear cuts and notches, tile cutters and grinders prove dependable. Score the surface first, then cut gradually to prevent chipping.
Hole saws excel for cables and pipes penetrating through a slip’s centre. Measure carefully twice, then drill once. There’s no reversing this action.
Always cut conservatively initially. Additional material removal remains possible, but replacement is impossible.

Installing Behind Kitchen Cabinetry? Ideally, yes. Practically speaking, tiling behind cabinets wastes resources and effort on invisible surfaces. For kitchens, tiling just visible sections makes better sense.
Tile as near to units as feasible. Measure spacing accurately and cut slips so front edges remain clean and straight. Optimally, the slip face should sit perfectly flush with the cabinet surface.
Certain courses may need small corner notches to accommodate cabinet edges. Execute these cuts slowly and frequently check the fit.
Benefits of Tiling Behind Extractors, Wall-mounted extractor fans are lightweight and simple to detach, making them an exception where tiling behind proves worthwhile. Remove the unit, install brick slips, then reattach
This method maintains flexibility. Should you replace the extractor eventually, the wall beneath will already look complete.
Working Around Shelving Units, Detaching and Refitting Shelves.
Shelves must always be removed prior to installation and replaced afterward. For exact repositioning, mark their locations lightly beforehand.
Transfer your reference marks onto slips using pencil. Once pointing is complete, marks vanish entirely.
Employ a masonry bit and extended fixings minimum forty millimetres to guarantee secure attachment through the slip into the wall. When feasible, drill through brick rather than mortar, which offers greater strength.
Artwork, Neon Displays, and Decorative Pieces, Identical principles apply when hanging pictures, mirrors, or neon signs. Measure accurately, drill carefully, and select suitable fixings.
Always target the brick. Mortar is less dense and more susceptible to deterioration over time.

Hasty Cutting – Rushing produces damaged slips and irregular edges. Patience pays off significantly here.
Inaccurate Measurements – Approximations become visible. Precise measuring separates professional-quality work from uneven results.
Skipping Final Sealing – Unsealed gaps accumulate debris and moisture. A few additional minutes sealing provides substantial long-term benefits.
Post-Installation Verification – Replacing Fixtures and Fittings
After completing all tiling and pointing, carefully reinstall outlets, lighting, shelves, and cabinetry.
Creating an “Original Installation” Appearance, Step away and examine your completed work. Clean edges, tight joints, and properly refitted fixtures create the convincing illusion.
Installing brick slips around fixtures and fittings isn’t about avoiding challenges it’s about accommodating them skillfully. Through careful preparation, accurate cutting, and adequate patience, outlets, lighting, cabinetry, and shelves can integrate seamlessly into your brick slip wall.
When executed properly, the final result doesn’t resemble a renovation. It appears as though the wall was always designed that way.
